
My dad always told me, “Three minutes without air, three days without water, three weeks without food.” Well, 3 hours without water in the ancient lava flows of Sisters Wilderness is both agonizing and wondrous. There were four of us: Scott, Michelle, Samantha, and Chris (me).
Scott Lake Trailhead, Hwy 242, Sisters Wilderness, Oregon
The plan, by way of government instruction, was to show up the morning of at the ranger station. The point of this, as the government-operated website told us, was to purchase overnight camping passes on a first-come-first-serve basis… Of course, passes were sold out. The individuals at the ranger station laughed, ‘Reservations are made online, up to one year in advance.’ We had to go out to the van to calm down (and conspire to just say damn the passes, and stay in the protected area anyway). The Obsidian protected area is about 3 square miles – allowing 30 day-hikers and 40 overnight visitors. We deliberated for a while on how to reapproach the trip; Do we break the rules? Or do we lay our tents down outside of the protected area, just north of Obsidian falls by about two miles. We sat in the van for some time making fun of the ranger station and creating numerous inside jokes about pretending to be a group of lost Austrians or a rag-tag stoner family with no ID or know-how when it comes to reading maps. We decided to go the legal route and head to the Scott Trailhead. Scott Trail follows the lava flows and links up with the Pacific Crest Trail just a short hike Northeast of Obsidian. Our maps showed plenty of rivers crossing the trail. Here arose trial number two: We assumed with all the river crossings that there would be water along the way. WRONG. It was the middle of summer. All river beds were dry. Even though they made no mention of this at the ranger station, we shouldn’t have made any assumption. Always know where the water is, and plan accordingly to fuel you to your next source. I certainly hope future summer backpackers in this area are properly warned by rangers, and conduct proper seasonal planning (i.e. reading this article).

This all brings up a third trial or in this case a lesson: Solutions to problems are all around, and very likely right in front of you. For example, being open minded to the possibility of snow in glacier country, even in summertime, can save your life. Even though glaciers are receding all over the world right now, there might be some packed snow behind some nearby trees against a shaded bank. In our case, there was some snowpack, and Sam and I cruised past it in our hurry to find a river somewhere down the trail. We pushed ahead of Scott and Michelle in order to (hopefully) find some agua at the Sawyer Bar/PCT junction but it was dry riverbed after dry riverbed. We became slightly skeptical after seeing no other hikers for the entirety of Scott Trail (of course not – there is no water!). The packs on our backs seemed heavier with every turn in the path. We took frequent stops to catch a moment in the shade, but mostly to convince each other that it’s okay to cry and that heaven will have tons of water. At this point, Sam and I were well on the Pacific Crest Trail and I was asking each passing through hiker how much further the water was. Each new answer was more maddening than the last… It was always ‘Bout point three miles’ or ‘Yeah, you got three-tenths of a mile to go.’ After definitely hiking more than one-third of a mile, we finally reached Scott Spring, where we ended up making camp. It was like we’d never experienced the luxury before in our lives. We splashed in it, dunked our faces, and kicked off our shoes and soaked our aching feet. Our first instinct was to quench our thirst and immediately head back down with full water bottles and snacks, which is what we did. Luckily, it turns out the two we left behind had the keen awareness to look for snowpack. Where we marched past valuable trail resources, they found and melted snow with camp stoves. The water they procured was enough to power them on to meet us near the junction at PCT/Scott Trail on our way back down the trail.

Lesson four: If you decide to split from your party to find water or shelter, have a plan to communicate. We used pink ribbon and varied the length to suggest our action. Short strip meant we haven’t found water and were continuing to look for it. Long strip meant we found some and are on our way back. Fortunately, Sam brought a pen and literally wrote a note of intention on the long pink ribbon. Also, once you find the glorious ice-cold spring and you feel that victory has been won. You’re ready to embark upon your rescue hike… Think again! You surely want to bring clothes that will protect you from a drop in temperature and shoes that will conduct carrying some gear or someone – in case of injury or pure exhaustion. Don’t forget headlamps!
Freeze dried meals were the cuisine of choice on the trip, along with trail mix, Clif bars, and the occasional sour gummy. Food tip: Always stir and mix your boiling water into every inch of the dehydrated food mixture before squeezing out the air and closing. If you can handle carrying it, some extra cheese goes a long way with certain meals like chili, pasta, or soup.
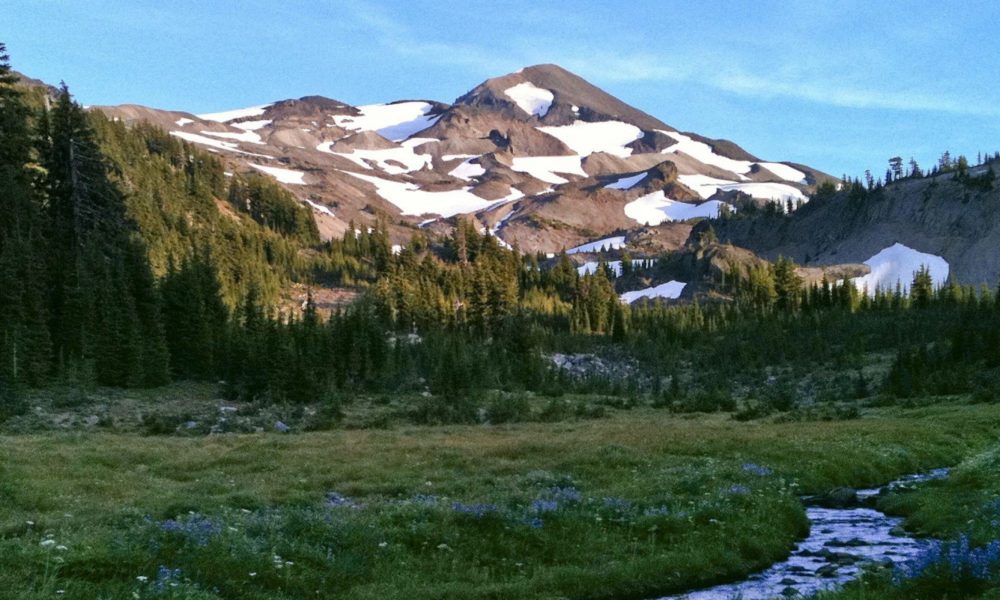
Many of you may know this, but binoculars are worth their weight in gold. From the bluffs surrounding our camp at Scott Spring, the glassing was spectacular. The views soar up to 100 + miles. To the Northwest you can gaze at Mount Washington, Three-Fingered Jack, Jefferson, Hood, and even Mount Adams on a clear day. To the South you can get detailed impressions of North Sister, Little Brother, and Middle Sister. From our camp, you could day hike to Lava Lake to the north, and Obsidian Falls and the protected area (as long as you don’t stay there) to the South. This a great place to jump from if you wanted to summit North or Middle Sister during your trip.The hike down took us half the time it took to venture up, including lunch, which was a delicious chicken gumbo (freeze dried).


Not only was I blessed just to share in the joy of the backcountry with the love of my life and her family, but she made sure we will have it for all-time, by proposing to marry me and merge our families – A fantastic lesson (and adventure) indeed. I can’t wait to go back to Scott Spring for years and years to come. Without intending it, a familial backpacking tradition was born.


You must be logged in to post a comment.